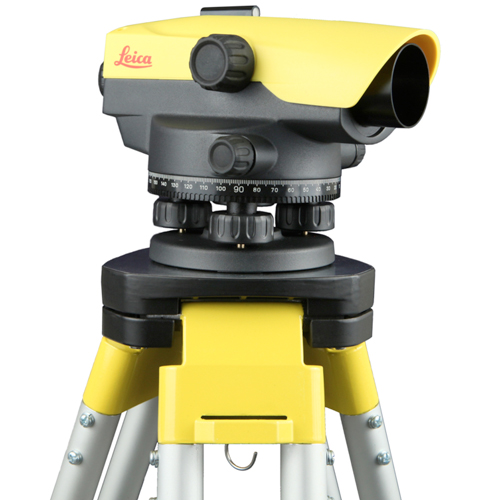
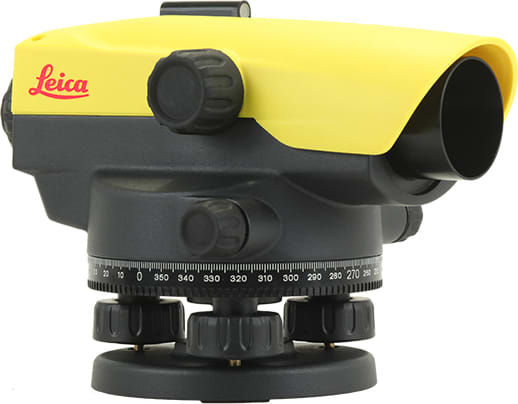
Operating a Leica NA324 Auto Level is relatively straightforward. Auto levels are commonly used in surveying and construction to measure height differences and establish horizontal lines. Here are the basic steps to operate a Leica NA324 Auto Level:
1. Set Up the Auto Level:
- Find a stable and level surface to set up the instrument. Use a tripod to mount the auto level securely. Ensure that the tripod is stable and properly adjusted.
- Attach the auto level to the tripod using the threaded connection on the bottom of the instrument.
2. Rough Leveling:
- Before fine-tuning, perform a rough leveling of the instrument. This can be done by adjusting the tripod legs.
- Look through the eyepiece and rotate the auto level until the crosshairs in the view are roughly level. This is typically done by turning the instrument on the tripod.
3. Adjust the Focusing:
- Focus the eyepiece by turning it until the crosshairs appear sharp and clear. You may need to adjust the focus to your eyesight.
4. Fine Leveling:
- Look through the eyepiece and rotate the instrument again to ensure that the crosshairs are precisely level. Use the leveling screws on the base of the instrument to make fine adjustments until the crosshairs are perfectly horizontal.
5. Take Measurements:
- Once the auto level is accurately leveled, you can start taking measurements.
- Sight a staff or leveling rod held by an assistant. Read the staff reading in the crosshair of the auto level. The staff reading will give you the height difference between the instrument and the point on the staff.
6. Record Measurements:
- Record the staff readings for various points as needed for your survey or construction task.
7. Calculate Elevations:
- Depending on your project, you may need to calculate elevations based on the staff readings. This can involve using the auto level’s specifications and mathematical formulas.
8. Packing Up:
- After you have finished using the auto level, carefully detach it from the tripod.
- Make sure to store the instrument in its protective case to prevent damage during transportation and storage.
Always refer to the user manual specific to your Leica NA324 Auto Level for detailed instructions and specifications. Additionally, consider calibrating and checking the instrument regularly to ensure accurate measurements.
Certainly! Here are some frequently asked questions (FAQs) about the Leica NA532 Auto Level:
1. What is the Leica NA532 Auto Level used for?
- The Leica NA532 Auto Level is primarily used in surveying and construction to measure height differences, establish horizontal lines, and perform accurate leveling tasks.
2. How do I set up the Leica NA532 Auto Level?
- To set up the auto level, mount it securely on a stable tripod and ensure the tripod is level. Roughly level the instrument, then use the leveling screws to fine-tune until the crosshairs are perfectly horizontal. Focus the eyepiece for clear visibility.
3. How do I take measurements with the NA532 Auto Level?
- Look through the eyepiece and sight a leveling rod held by an assistant. Read the staff reading in the crosshair of the auto level. This reading will give you the height difference between the instrument and the point on the staff.
4. Can I use the Leica NA532 Auto Level in low light conditions?
- Yes, the auto level is designed to work in various lighting conditions, including low light. However, for the best results, it’s advisable to work in well-lit conditions.
5. How do I care for and maintain my Leica NA532 Auto Level?
- Store the instrument in its protective case when not in use to prevent damage.
- Keep the lenses and optics clean to ensure clear visibility.
- Regularly check and calibrate the instrument to maintain accuracy.
- Avoid exposing the auto level to extreme temperatures or moisture.
6. What is the working range of the Leica NA532 Auto Level?
- The working range can vary depending on the specific model and version, but it typically has a working range of several hundred feet or meters. Check the instrument’s specifications for precise details.
7. Can the Leica NA532 Auto Level be used for both horizontal and vertical measurements?
- The primary function of the auto level is for horizontal leveling and measuring height differences. It is not typically used for precise vertical measurements.
8. How do I calculate elevations using the Leica NA532 Auto Level readings?
- Elevations can be calculated by subtracting the staff reading from a known benchmark or reference point’s elevation. The instrument’s user manual may provide specific guidance on elevation calculations.
9. Can I use the Leica NA532 Auto Level for outdoor and indoor measurements?
- Yes, the auto level is suitable for both outdoor and indoor use, depending on your project requirements.
10. Where can I find the user manual for the Leica NA532 Auto Level? – You can typically find the user manual for your Leica NA532 Auto Level on the manufacturer’s website or by contacting Leica Geosystems customer support.
Always refer to the specific user manual for your model and consult with professionals experienced in surveying and leveling for the most accurate and reliable results.

